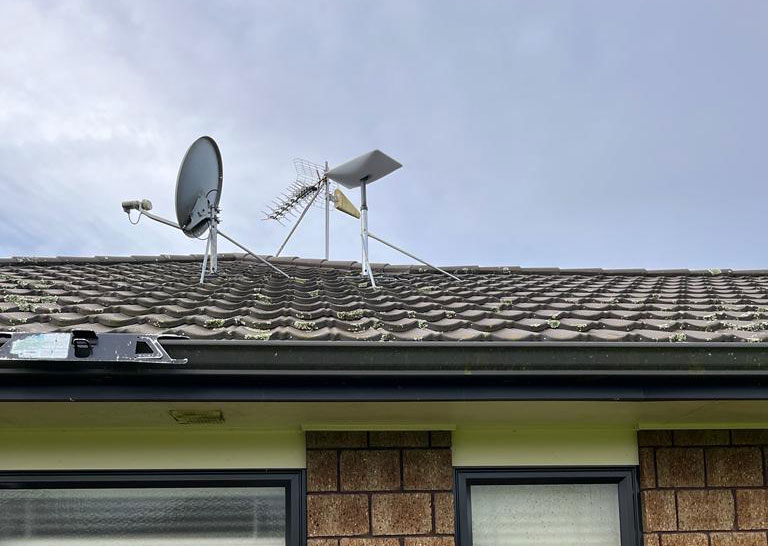
Every Starlink mounting problem comes down to one dish and one question: where does this specific hardware physically attach? The answer is different for the **Gen 2 Standard** (motorized, 1.375 in mast), the **Gen 3 Standard** (kickstand, 110° field of view), and the **Mini** (2.7 lb kickstand panel that lives in a backpack). This guide maps every mounting scenario – roof, wall, pole, RV ladder, and portable – to the right accessory for each hardware generation, starting with what Starlink’s own mounts do well and where the third-party market beats them.
Quick Summary / Top Recommendations
| Product | Best For | Key Features | Price |
|---|---|---|---|
 | Best Overall - Heavy-Duty Starlink Roof Clamp Kit |
| Check Price on Amazon |
 | Best for Full-Time RVers - Starlink Ladder Mount |
| Check Price on Amazon |
 | Best for Off-Grid Homes - Pipe Adapter + Ground Pole |
| Check Price on Amazon |
Know Your Dish First: Three Generations, Three Mounting Systems
Gen 2 Standard (Motorized Rectangular)
The Gen 2 dish is roughly **20 x 23 in** with a motorized base that self-levels and self-aims. It attaches through a **1.375 in diameter mast stub**, which means third-party mounts must clamp a pipe that holds the dish at that exact diameter – oversized cradles designed for TV antennas will rattle loose. Power draw is **50-75 W typical** (more in snow-melt mode), so longer cable runs on mobile installs need planning. The stock 50 ft proprietary cable and the official **Pipe Adapter** are the baseline; everything else in the third-party market clamps or bolts to that adapter.
Gen 3 Standard (Kickstand, No Motors)
Gen 3 dropped the motors and widened the field of view to about **110 degrees**, which is a gift for mounters: the dish tolerates slightly imperfect aiming, so you can prioritize structural strength over perfect pitch. The dish clips into the included **kickstand** for ground use, and the **Gen 3 Pipe Adapter** (a separate accessory with a rotating collar) accepts masts from **1.25 to 2 in**. Max consumption is around **110 W**, and the dish is powered through the same proprietary cable the Gen 3 router uses.
Mini (Portable)
The Mini weighs about **2.7 lb**, measures roughly **11.4 x 9.8 in**, and has its own Wi-Fi router and kickstand built in. It needs **60 W minimum over USB-C PD** (100 W recommended for snow-melt and fast startup). For mounting, this means camera-grade hardware: a tripod head, a small rail clamp, or a magnetic base is plenty. See our dedicated Starlink Mini mounts and power guide for the portable ecosystem.
Mounting Fundamentals That Apply to Every Starlink
1. Clear the Northern Sky (North America)
All three dish types need an unobstructed view toward satellites passing overhead. Use the obstruction checker in the official app **before** buying a mount – a $0 scan beats a $120 clamp bolted to the wrong side of the house.
- Gen 2: the motors steer, but the base still needs open sky above roughly **25 degrees elevation**.
- Gen 3: the wide **110° FOV** forgives marginal aiming but cannot see through trees – foliage dropouts still happen.
- Season: an April-clear spot can be blocked by June foliage or January snow load. Check twice a year.
2. Wind Load
A Standard dish is a sail roughly the size of a car windshield. Match the mount to the weather:
| Mount Type | Typical Wind Rating | Anchoring Requirement |
|---|---|---|
| Roof penetration mount | **90+ mph** | Lag bolts into rafters, sealed with roofing caulk |
| Standing seam clamp | **80 mph** | 30-40 ft-lb clamp torque on the seam |
| RV ladder clamp | **55-65 mph** | Ladder must be riveted/bolted to structure, not glued |
| Ground pole (Gen 3 Pipe Adapter) | **75 mph** | **24+ inches** of concrete-anchored footing |
3. Cable Routing Before You Drill Anything
Both Standard dishes use a proprietary cable with a chunky waterproof connector – the Gen 2 plug is wide enough that it will not pass through a standard 1/2 in cable gland. Plan a cable pass-through sized for the connector, keep runs short on 12V builds, and leave a drip loop below every entry point.
Fixed Home Installs
Official Mounts: When to Just Buy Starlink’s Own
Starlink’s first-party lineup covers the common cases: the **Volcano Roof Mount** (low-profile penetration install), the **Long Wall Mount** (eave attachment), the **Pivot Mount** (adjustable pitch on flat surfaces), and the **Pipe Adapter**. They are well built and warranty-safe. Their weakness is price and lack of options for odd surfaces – which is exactly where the third-party market earns its keep.
Roof Penetration vs No-Drill
A penetration mount is the strongest and most permanent option, but it puts holes in your roofing membrane. On metal roofs, no-drill seam clamps grab the standing seam directly with **30-40 ft-lb** of torque and never break the waterproofing – we tested five kits through 200 freeze-thaw cycles without slippage. On asphalt shingle, choose a flashing-mounted lag bolt into rafters and seal with a compatible roofing caulk.
RV and Mobile Installs
Ladder Mounts
The RV ladder is the most convenient structural rail on any rig. Dedicated Starlink ladder mount kits grip rails **14-16 in** wide with padded jaws and accept both the Gen 2 stub and the Gen 3 Pipe Adapter. The critical check: your ladder must be bolted or riveted to the structure. Adhesive-mounted ladders will fail in crosswinds. Full testing in our RV ladder and roof rack mount roundup.
Roof Rack and Rail Clamps
Adventure vans can use **1-2 in rail clamps** designed for solar panels. Match metals (aluminum clamp on aluminum rack) and add isolation washers between dissimilar metals to prevent galvanic corrosion. Gen 3’s kickstand can even sit flat inside a roof rack basket for fair-weather camping.
Pole and Ground Mounts
For wooded lots, lift the dish **10-20 ft** on a galvanized pole: **1.5-2 in** inside diameter, set **24 in** into concrete, topped with the Gen 3 Pipe Adapter or a Gen 2 stub cradle with adjustable tilt. A pole mount makes seasonal re-aiming, snow removal, and cleaning trivial – and it is the cheapest way to buy clear sky on a tree-lined property.
Quick Compatibility Check
Not sure which mount fits your dish? The Gen 2 vs Gen 3 vs Mini compatibility matrix lists every official and third-party mount type against all three hardware generations, including mast diameters and connector sizes.